
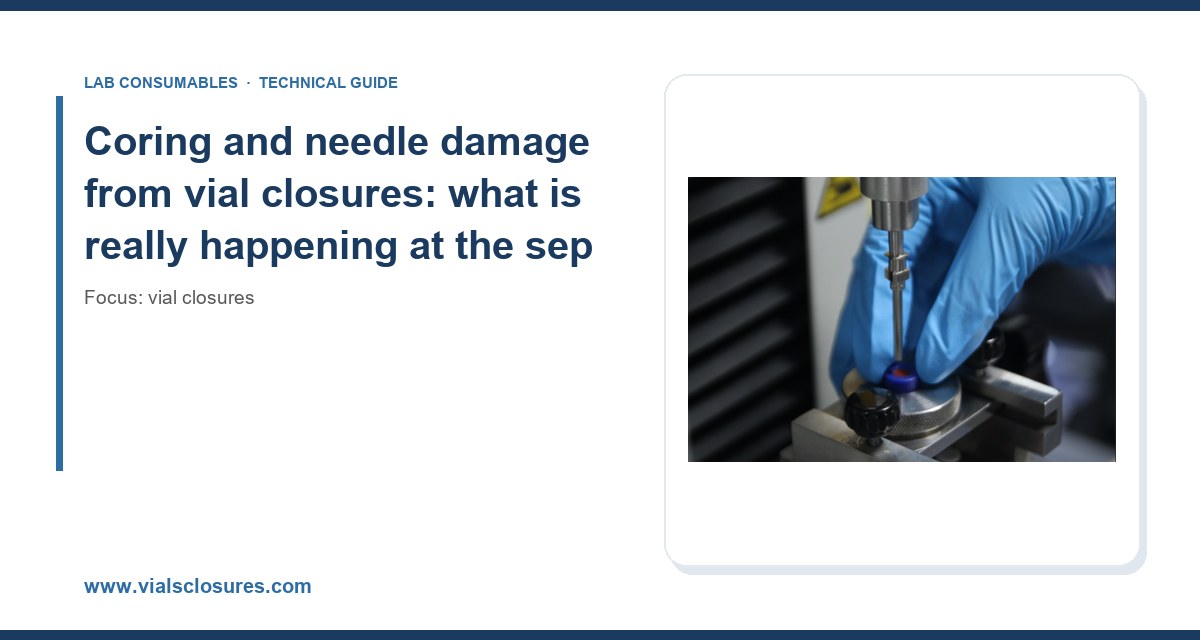
I still remember the Monday morning when a stability batch of 96 vials came back from the autosampler with a chromatogram that looked like it had been drawn by a caffeinated toddler. Peaks were split, there were ghost peaks at 2.3 and 4.1 minutes, and the internal standard RSD had blown out to 11.8%. The method had been validated at <1.5% RSD. The culprit was not the column, not the mobile phase, and not the instrument. It was a box of 11 mm closures with a durometer that was too hard and a septum that had been punched 60 times by a 22-gauge needle with a bevel that had gone dull. Once we switched to a softer silicone/PTFE septum and changed needles at the 40-puncture mark, the RSD dropped back to 0.9%. Coring is one of those problems that hides in plain sight. It looks like an injection problem. It is almost always a closure and needle interface problem.
Coring and needle damage from vial closures: what is really happening at the septum
Coring is the mechanical removal of a small plug of septum material by the needle as it passes through. That plug has to go somewhere. Sometimes it stays attached to the needle and gets dragged into the injection port. Sometimes it drops into the vial and floats in the sample. Sometimes it sits on the septum surface and blocks the next needle. All three outcomes are bad, and all three show up as chromatographic artifacts rather than as a visible closure failure. That is why coring gets misdiagnosed so often. The closure looks fine. The vial looks fine. The data does not.
Needle damage is the other half of the problem. A needle that has been pushed through a hard septum, or through a septum that has been pierced in the same spot repeatedly, develops a burr on the bevel. A burred needle then cores the next septum faster. The two failure modes feed each other. If you only replace one, you will be back to the same chromatogram within a week.
What the needle actually does to the septum
A standard 22-gauge autosampler needle has an outside diameter of 0.72 mm and an inside diameter of about 0.41 mm. The bevel is usually a short or medium bevel with a 12° to 20° angle. When the needle enters a 1.5 mm thick silicone septum, it does not cut a clean hole. It stretches the elastomer, then tears it. The tear is where the core comes from. A sharp, well-formed bevel produces a slit that closes back on itself. A dull or burred bevel produces a ragged hole, and the ragged edge is the core.
This is why needle gauge matters more than most labs realize. A 26-gauge needle (0.46 mm OD) through a soft 50 Shore A silicone septum will produce almost no coring. The same needle through a 65 Shore A silicone/PTFE septum will core from the first puncture if the bevel is not sharp. I have seen labs chase a “column problem” for three weeks when the real issue was a batch of needles with a 0.05 mm burr on the heel of the bevel. Under a 10x loupe, the burr was obvious. Without magnification, it was invisible.
Why the closure is the variable you can actually control
You cannot easily change the needle the autosampler was designed around. You can change the closure. The closure specification that matters for coring is the septum: material, durometer, thickness, and whether it is bonded to the liner or free-floating. A silicone/PTFE septum with a 50 to 55 Shore A durometer and a 0.9 to 1.1 mm silicone layer is the workhorse for HPLC and GC autosamplers. A butyl septum at 55 Shore A is fine for short-run GC but cores faster than silicone under repeated puncture. A natural rubber septum is cheap and should be avoided for anything with a needle going through it more than a handful of times. The durometer is the number to ask for. If the supplier cannot give you a durometer, that is your answer.
If you are specifying closures for a new method, start with the closure range at Vial Closures and match the septum to the needle, not the other way around. The closure is the part you can swap in an afternoon. The autosampler needle magazine is not.
The four coring mechanisms and how to tell them apart
Not all coring looks the same. I have sorted the failures I have dealt with into four mechanisms. Each one has a different fingerprint in the data and a different fix.
1. Bevel coring (needle-side)
This is the classic. The needle bevel is dull, burred, or the wrong geometry for the septum. The core is a clean plug that matches the needle ID. You will find it floating in the vial or stuck to the septum underside. The chromatographic fingerprint is a single ghost peak that appears after a specific injection number, usually between 30 and 60 punctures. Fix: replace the needle, and check the bevel angle against the septum thickness. A short bevel is better for thin septa; a medium bevel is better for thick ones.
2. Durometer coring (closure-side)
The septum is too hard for the needle. The core is smaller and more ragged, and you often get multiple small fragments rather than one plug. The fingerprint is a rising baseline and intermittent split peaks, because the fragments migrate. Fix: drop the durometer by 5 to 10 Shore A. If you are at 65 Shore A, go to 55. If you are at 55, go to 50.
3. Repeated-puncture coring (position-side)
The autosampler is hitting the same spot on the septum every time. Even a good needle and a good septum will core eventually if the puncture position never moves. The fingerprint is a clean core at exactly the same clock position every time, and the failure appears at a predictable puncture count. Fix: enable the autosampler’s random or rotating puncture position if it has one, or rotate the vial 180° at the halfway point of the run. On a 100-vial batch, that alone can double the usable septum life.
4. Liner delamination coring (bond-side)
The PTFE liner separates from the silicone layer and the needle pushes a flap of PTFE into the vial. This is not a true core, but it behaves like one. The fingerprint is a PTFE fragment visible under the vial light and a ghost peak that co-elutes with late-eluting analytes. Fix: switch to a bonded septum with a specified bond strength, or move to a pre-slit septum if the method allows it.
Puncture count: the number nobody tracks and everybody should
Every septum has a puncture life. The published number for a good silicone/PTFE septum is usually 50 to 100 punctures per vial under ideal conditions. In my experience, “ideal” means a sharp 22-gauge needle, a 50 Shore A septum, a random puncture position, and a sample that does not swell the elastomer. Take away any one of those and the number drops fast. I have seen 65 Shore A septa core at 12 punctures with a burred needle. I have seen 50 Shore A septa go 150 punctures with a fresh needle and rotating position.
The practical fix is to track punctures per vial in the run method. Most autosampler software will let you set a maximum injection count per vial. Set it to 40 for a 22-gauge needle and a 55 Shore A septum. Set it to 25 if the needle is a 21-gauge or larger, because the larger OD removes more material per puncture. If you are running a method that needs more than 40 injections from one vial, use a pre-slit septum or a silicone-only septum with a 45 Shore A durometer and accept the higher gas permeability.
Comparison: septum types by coring resistance and puncture life
- Silicone/PTFE, 50 Shore A, 1.0 mm silicone: best coring resistance, 60 to 100 punctures, good for HPLC and GC, temperature range -40 °C to 200 °C. The default choice for most autosamplers.
- Silicone/PTFE, 65 Shore A, 0.9 mm silicone: harder, 20 to 40 punctures before coring, better for high-pressure or headspace use, temperature range -40 °C to 200 °C. Use only with a sharp needle and a random puncture position.
- Butyl/PTFE, 55 Shore A: 15 to 30 punctures, excellent gas barrier for GC headspace, temperature range -40 °C to 120 °C. Cores faster than silicone; do not use for long HPLC sequences.
- Natural rubber/PTFE, 50 Shore A: 5 to 15 punctures. Cheap. Avoid for any method with repeated injections.
- Pre-slit silicone/PTFE, 50 Shore A: 100+ punctures because the needle enters an existing slit, but the slit is a leak path. Use only for HPLC at ambient pressure, never for headspace or GC.
Needle damage: the failure mode that starts on the closure
A needle that has been used through 500 punctures on a 65 Shore A septum will show visible wear on the bevel under a 20x loupe. The heel of the bevel rounds over, and a small burr forms on the long side. That burr is the coring tool. I have measured burr heights of 0.03 to 0.08 mm on needles that were still “working” but producing coring. The needle does not fail in a way the autosampler detects. It just starts damaging septa.
The fix is a needle inspection schedule, not a needle replacement schedule. Inspect the bevel under magnification every 200 punctures. Replace at the first sign of a burr, or at 1,000 punctures regardless, whichever comes first. If you are running a 96-well plate equivalent in vials, that is roughly every 10 to 20 runs. Write it into the PM schedule. A replacement needle costs less than the rework from one bad batch.
Needle gauge and septum thickness: the pairing that matters
A 22-gauge needle through a 1.5 mm silicone septum is a comfortable pairing. A 21-gauge needle (0.51 mm ID) through the same septum removes about 40% more material per puncture and cores faster. A 26-gauge needle through a 1.0 mm septum is gentle but fragile; the needle bends before the septum cores. Match the needle OD to the septum thickness: keep the ratio of needle OD to septum thickness below 0.5. At 0.72 mm needle and 1.5 mm septum, the ratio is 0.48, which is right at the edge. A 1.0 mm septum brings it to 0.72, which is worse. Thicker is not always better for coring; it is better for evaporation and gas barrier.
Operational precautions that actually reduce coring
These are the changes I have made in labs and had stick. None of them require new instrumentation.
- Set a puncture limit per vial in the run method. 40 for a 22-gauge needle, 25 for 21-gauge, 60 for 26-gauge.
- Enable random puncture position if the autosampler supports it. If not, rotate the vial 180° at the halfway point of the run.
- Inspect needles at 200 punctures under a 10x to 20x loupe. Replace at the first burr.
- Cap the vial with the correct crimp or screw torque. For a 11 mm crimp, use a crimper set to 1.5 to 2.0 in-lb (about 0.17 to 0.23 N·m). Over-crimping compresses the septum and increases coring because the needle has less elastomer to stretch. For a 9 mm screw thread, tighten to 0.6 to 0.8 N·m; hand-tight is not a specification.
- Check the septum for pre-puncture damage before loading. A septum that has been sitting in a tray with the liner side down can pick up a dimple that becomes a core.
- Use the correct GPI finish. The GPI 18 mm and GPI 20 mm thread finishes are not interchangeable with 13 mm or 24 mm; a mismatched closure seats at the wrong depth and the needle enters at an angle. That angle is a coring source. The Glass Packaging Institute thread specifications are the reference; ask your supplier for the GPI finish number on the drawing.
Troubleshooting checklist for suspected coring
Work through this in order. It takes about 30 minutes and will save you a week.
- 1. Look at the septum. Remove the closure from a vial that produced a bad chromatogram. Inspect the underside under a light. A clean slit is normal. A ragged hole or a missing plug is coring.
- 2. Look in the vial. A small plug of silicone or PTFE at the bottom is a confirmed core. Note the color: white or translucent is silicone, opaque white is PTFE.
- 3. Check the needle. Under 10x magnification, look at the bevel. A burr on the heel or a rounded tip is needle damage. Replace the needle and re-run the same vial.
- 4. Count punctures. Pull the injection log for the vial. If the count is above 40 for a 22-gauge needle, you have found the cause.
- 5. Check the durometer. If the septum is 65 Shore A or harder and the needle is 22-gauge or larger, the pairing is marginal. Drop to 50 to 55 Shore A.
- 6. Check the crimp or torque. An over-crimped 11 mm closure shows a distorted septum and a compressed liner. Re-crimp a test vial at 1.5 in-lb and compare.
- 7. Check the puncture position. If every core is in the same clock position, the autosampler is not randomizing. Fix the method.
- 8. Check the liner bond. If the PTFE flap is separating, the septum is delaminating. Switch to a bonded septum or a different supplier.
What to specify when you buy, and what to reject
When you write the closure specification, put these numbers on the drawing. A supplier who cannot meet them is not a supplier for this application.
- Septum material: silicone/PTFE, 50 to 55 Shore A, silicone layer 0.9 to 1.1 mm, PTFE layer 0.05 to 0.13 mm.
- Puncture life: ≥50 punctures with a 22-gauge needle at 1.5 in-lb crimp, verified by a coring test (pierce 50 times, inspect under 10x, no plug >0.5 mm).
- Temperature range: -40 °C to 200 °C for silicone/PTFE; -40 °C to 120 °C for butyl.
- GPI finish: state the finish number (GPI 13 mm, GPI 18 mm, GPI 20 mm, GPI 24 mm) and the crimp or thread type.
- Bond strength: PTFE-to-silicone peel strength ≥1.5 N/cm for bonded septa. Ask for the test method.
- Extractables: for HPLC, ≤0.5 µg/mL total extractables in 50:50 water:acetonitrile after 24 h at 40 °C. This is where cheap closures show up as ghost peaks.
If you are sourcing for a validated method, run the coring test as part of incoming inspection. It takes an hour and catches the bad lots before they reach the autosampler. The same discipline applies to the rest of the consumables in the workflow; the Chromatography Consumables range is a useful reference for what a full specification should look like, and the HPLC vial selection guide covers the vial side of the interface.
How coring shows up in the data, and how to prove it
Coring does not announce itself. It shows up as a change in peak shape, a new ghost peak, or a slow drift in response factor. The tell is that the problem follows the vial, not the instrument. If you re-inject the same sample from a fresh vial and the problem disappears, the closure was the cause. If it follows the sample, it is a sample preparation issue.
For a formal investigation, run a controlled puncture test. Take 10 vials from the suspect lot and 10 from a known-good lot. Pierce each septum 50 times with the same needle, then inspect under 10x. Count the cores. A good lot will show 0 to 1 cores. A bad lot will show 5 or more. That is enough evidence to reject the lot and open a supplier corrective action. The analytical testing resources at Analytical Testing are useful for the method validation side of this, and the instrument vendors publish their own guidance on needle and septum compatibility, including Agilent’s chromatography consumables and column documentation and Thermo Fisher’s chromatography and sample handling guidance. For GC methods specifically, the Restek technical resources have good notes on septum bleed and coring in headspace work. If your lab runs environmental methods, the U.S. EPA SW-846 test methods are the reference for the sample handling requirements that the closure has to meet.
A note on headspace and GC
Headspace is where coring gets expensive. A cored septum in a headspace vial is a leak path, and a leak path changes the partition coefficient. You will see response factors drop by 10 to 30% across a run as the septa core. The fix is the same as for HPLC, but the specification is different: use a butyl/PTFE septum at 55 Shore A for short runs, or a silicone/PTFE at 50 Shore A for longer ones, and set the puncture limit to 1 per vial for headspace. A headspace vial should be pierced once. If your method is piercing the same headspace vial more than once, you are already outside the design intent of the closure.
Takeaway
Coring and needle damage are not random. They are the predictable result of a specific pairing: a needle bevel, a septum durometer, a puncture count, and a crimp torque. Get those four numbers right and the problem goes away. Specify 50 to 55 Shore A silicone/PTFE septa, cap the puncture count at 40 for a 22-gauge needle, inspect needles at 200 punctures, and crimp 11 mm closures at 1.5 to 2.0 in-lb. If you are still seeing cores after that, the problem is the lot, not the method, and the puncture test will prove it.
References & further reading
Related resources from our lab consumables network:
- Vial Closures at vialsclosures.com
- Analytical Testing at testinganalytical.com
- Hplc Vial at vialforhplc.com
- Chromatography Consumables at chromatographyconsumables.com
External references and standards: