
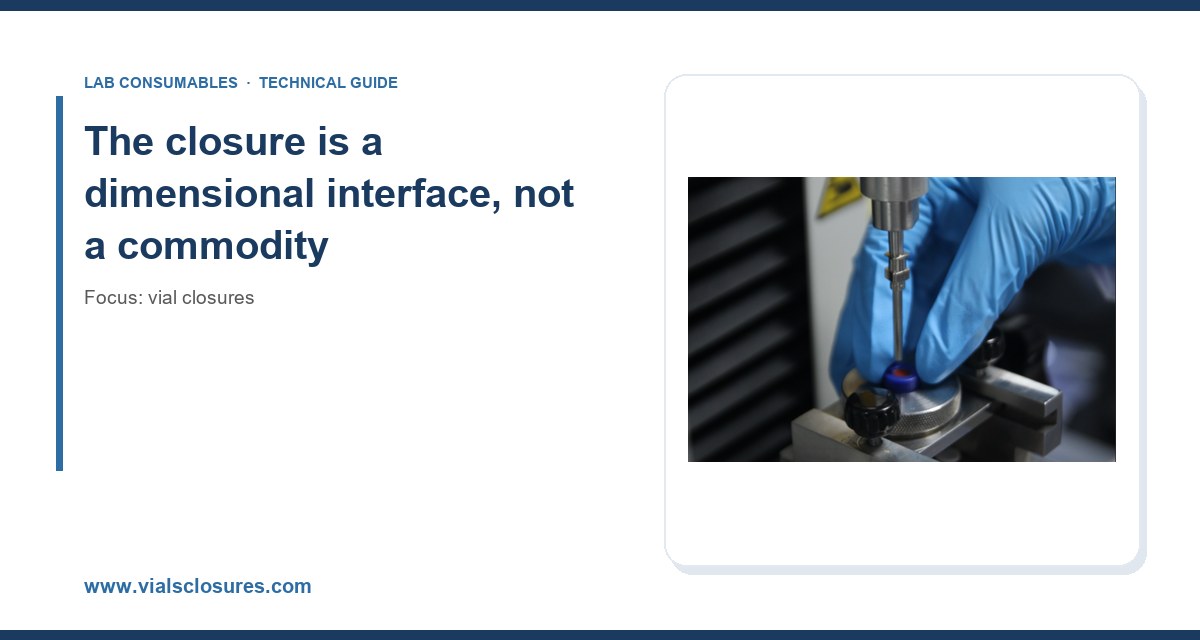
I once watched a lab spend six figures on a new LC-MS/MS system, then lose a week of sample throughput because the autosampler gripper kept dropping vials. The cause was not the instrument. It was a 9 mm short screw cap with a 6 mm septum sitting on a 12 x 32 mm vial that had been molded about 0.4 mm out of tolerance on the neck OD, so the gripper jaws could not get a clean purchase. That is the whole problem in one incident: the closure is a mechanical interface, and if its dimensions do not match the transport and injection hardware, the chemistry never gets a chance. This guide is about matching closure dimensions to your autosampler or inlet, with the numbers you need before you place a purchase order.
Most buying guides treat vial closures as a price-per-thousand decision. That framing gets people into trouble. A closure has to satisfy four different dimensional requirements at once, and each one is checked by a different piece of hardware on your bench.
- Neck finish and thread pitch. The 12 x 32 mm vial is governed by GPI 12 mm thread finishes (GPI 12-425 is the common one you will see referenced on molded vials and caps). The 8-425, 10-425, and 13-425 finishes are the other standards you will meet. A cap molded to the wrong finish may thread on by hand and still leak under pressure.
- Cap OD and skirt height. This is what the autosampler gripper, the tray nest, and the carousel see. Typical 9 mm screw caps run about 9.0 mm OD; 11 mm crimp caps run about 11.0 mm; 13 mm caps run 13.0 mm. The gripper is designed around one of these, not a range.
- Septum thickness and durometer. The septum has to compress enough to seal and stay thin enough that the needle reaches the sample and the injection port seal holds. A 1.0 mm silicone/PTFE septum and a 1.5 mm one behave differently in the same cap.
- Total stack height. Cap plus vial plus crimp or screw shoulder determines the height the autosampler sees when it picks from the tray. A 12 x 32 mm vial with a screw cap is typically about 32 mm tall; a crimp cap adds a few tenths more depending on the crimp depth. Some autosamplers have as little as 0.3 mm of vertical clearance in the tray nest.
If you want a broader grounding in how these parts interact before you start measuring, the overview at Vial Closures is a reasonable starting point. But the selection work has to be done against your specific instrument, and that is what the rest of this article covers.
Match the closure to the autosampler, not the other way around
Every autosampler has a published vial and closure specification. Pull it out. Not the sales brochure, the user manual or the site preparation guide. The numbers you are looking for are the vial dimensions, the maximum cap OD, the maximum total height, and the septum thickness range the needle guidance tolerates.
Common autosampler constraints by platform family
I have run or supported most of the major platforms, and the constraints cluster into a few recognizable patterns. These are the numbers I check first.
- Agilent 1260/1290 Infinity autosamplers (standard and multisampler). Designed primarily around 12 x 32 mm vials with 9 mm screw caps or 11 mm crimp caps. The gripper and tray nests are tight; I have seen third-party caps with a 9.4 mm OD jam in a tray nest that a genuine 9.0 mm cap slides through. If you buy aftermarket, measure the cap OD with a caliper before you commit to a full case.
- Waters Alliance and ACQUITY. Alliance is famously tolerant of 12 x 32 mm screw-top vials but less tolerant of cap height variation. ACQUITY sample managers are also 12 x 32 mm but the needle guidance is less forgiving of a septum that is too thin, because the needle can deflect off-center and bend.
- Thermo Scientific autosamplers (including the split-loop and Vanquish families). The Vanquish and related platforms are typically specified around 12 x 32 mm vials with 9 mm screw caps. Thermo’s own consumables pages are a useful cross-check on the exact cap OD and septum thickness they ship with the instrument. See Thermo Fisher chromatography and sample handling.
- Shimadzu SIL series. 12 x 32 mm is standard, but the rack nests on some SIL models are set for 11 mm crimp caps with a defined total height. Screw caps that sit 0.5 mm taller than a crimp cap can cause a “vial not detected” error on the rack sensor.
For Agilent specifically, the consumables catalog pages are the most reliable place to confirm the cap OD and septum spec for a given instrument model: Agilent chromatography consumables and columns. I keep a printed copy of the relevant pages in the lab binder so nobody has to guess at 2 a.m.
The three measurements that cause most mismatches
In my experience, mismatches almost always trace to one of three dimensions. Measure these on a sample of 10 caps from any new lot before you release it to the bench.
- Cap OD. Nominal 9.0 mm, but I have measured lots at 9.3 mm and 8.8 mm. The autosampler gripper has a fixed jaw opening; a cap that is 0.3 mm oversized will either drop or jam. Tolerances on molded polypropylene caps are typically ±0.1 mm, so a 9.3 mm cap is out of spec and should be rejected.
- Total assembled height. Vial plus cap plus septum. Nominal 32.0 mm for a 12 x 32 mm screw assembly, but the cap skirt depth and the septum compression change this. If the assembled height exceeds the tray clearance, the autosampler will either fail to pick the vial or crush the cap into the tray.
- Septum thickness. Nominal 1.0 mm for a standard 9 mm screw cap, but 1.5 mm is common on some crimp formats. A septum that is 0.2 mm too thick can prevent the needle from reaching the sample if the injection depth is set to the vial bottom, and a septum that is too thin will not seal after multiple punctures.
If you are running a high-throughput operation, you can push this measurement discipline upstream to your supplier. Ask for a certificate of analysis with the cap OD and septum thickness on every lot. If they cannot provide one, that tells you something about their process control.
Match the closure to the inlet and the injection
The autosampler is only half the interface. The other half is the inlet: the injection port on a GC, or the sample loop and needle seat on an LC. Here the closure dimensions that matter are the septum and the way the needle enters it.
GC inlet considerations
On a split/splitless GC inlet, the vial septum and the inlet septum are different parts, but they interact through the needle. A vial septum that is too hard (high durometer silicone) will resist needle penetration and can cause the needle to bend or coring. A septum that is too soft will tear and leave fragments in the vial, which then get aspirated into the syringe and eventually into the inlet liner. I have pulled silicone crumbs out of a liner more than once, and the resulting peak artifacts took a day to diagnose.
The practical rule: match the septum durometer to the needle gauge. Standard autosampler needles are 23 to 26 gauge (about 0.3 to 0.6 mm OD). A 1.0 mm silicone/PTFE septum with a Shore A durometer in the 45 to 55 range handles those needles well. For headspace or large-volume injection where the needle dwells longer, a slightly harder septum reduces coring.
For method development work that touches regulated environmental samples, the injection port conditions in U.S. EPA SW-846 test methods for waste and materials are worth reviewing, because the method specifies inlet temperatures and liner configurations that interact with septum choice. A septum rated to 200 °C in a 280 °C inlet will bleed and produce siloxane peaks that look like column contamination.
LC and LC-MS inlet considerations
On the LC side, the closure’s job is to keep the sample intact until the needle draws it, then reseal. The critical dimensions are septum thickness (for needle depth) and cap fit (so the vial does not move during aspiration). A vial that shifts in the tray during needle descent will produce an injection volume error that shows up as a 2 to 5 percent RSD spike. If your method requires RSD under 1 percent, cap fit is not optional.
For LC-MS work, septum bleed is the other issue. Standard silicone septa can leach siloxanes and plasticizers that show up as background ions. A PTFE-faced septum (PTFE on the sample side, silicone on the outside) reduces this. If you are running trace analysis, use a septum rated for the application and check the background with a blank injection before you trust a new lot.
A decision checklist with concrete numbers
This is the checklist I use when qualifying a new closure for a platform. It is written for a 12 x 32 mm vial with a 9 mm screw cap, which is the most common configuration, but the logic applies to crimp and snap formats too.
| Parameter | Target value | How to verify | Failure mode if out of spec |
|---|---|---|---|
| Cap OD | 9.0 mm ±0.1 mm | Caliper, 10 caps per lot | Gripper drops or jams; vial not detected |
| Thread finish | GPI 12-425 | Thread gauge or trial fit | Leak under pressure; cap backs off |
| Assembled height | 32.0 mm ±0.3 mm | Caliper, vial + cap + septum | Tray clearance failure; crush damage |
| Septum thickness | 1.0 mm ±0.1 mm | Micrometer, 10 septa per lot | Needle depth error; poor reseal |
| Septum durometer | Shore A 45 to 55 | Durometer or supplier CoA | Coring; needle bend; fragments |
| Puncture count (silicone/PTFE) | ≥ 3 clean punctures | Bench trial with your needle | Leak after multiple injections |
| Screw torque (hand-tight) | 0.4 to 0.6 N·m | Torque screwdriver | Over-tightening cracks cap; under-tightening leaks |
| Temperature rating (silicone) | −40 °C to 200 °C continuous | Supplier datasheet | Septum bleed; seal failure at high inlet temp |
Two notes on that table. First, the torque value is for hand-tightening with a torque screwdriver; most people over-tighten screw caps by feel, and a cracked cap skirt is a common cause of a vial that leaks only when the autosampler gripper squeezes it. Second, the puncture count is a bench measurement, not a datasheet claim. I have seen septa rated for five punctures fail at three with a 26-gauge needle at an angle. Test with your needle, your angle, and your injection depth.
Comparison: screw vs crimp vs snap for autosampler compatibility
- Screw caps (9 mm, GPI 12-425). Best for autosampler compatibility because the cap OD is consistent and the cap can be re-tightened. Downside is torque sensitivity and the risk of the cap loosening during transport. Use for most LC and GC autosamplers.
- Crimp caps (11 mm). More consistent seal because the crimp is mechanical, but the crimp depth must be set correctly (typically 0.1 to 0.2 mm below the cap shoulder). Over-crimping cracks the vial neck; under-crimping leaks. Crimp caps are less forgiving in autosamplers with tight tray nests because the crimp tool adds a small height variation.
- Snap caps. Fastest to apply and good for low-pressure applications, but the seal is less reliable under vacuum or high inlet pressure. I would not use them for LC-MS or for GC inlet pressures above about 10 psi.
If you want a deeper look at the closure formats themselves, the product pages at HPLC vial break down the 9 mm and 11 mm options with the dimensions called out. The point here is that the format choice is secondary to the dimensional match; a perfectly made crimp cap that is 0.3 mm too tall for your tray is worse than a mediocre screw cap that fits.
Operational precautions that prevent dimensional failures
Even a correctly specified closure can fail if the handling is wrong. These are the precautions I enforce on my own bench.
Storage and handling
Polypropylene caps and silicone septa absorb moisture and can change dimension slightly with temperature. Store closures in the original sealed bag at 15 to 25 °C and under 60 percent relative humidity. I have seen a case of caps left on a windowsill in summer measure 0.2 mm oversized after a week. That is enough to jam a gripper.
Assembly torque
Hand-tighten screw caps to 0.4 to 0.6 N·m. A torque screwdriver is cheap and removes the guesswork. Over-tightening (above about 0.8 N·m) deforms the cap skirt and can crack the vial neck; under-tightening (below 0.3 N·m) leaves the septum under-compressed and the seal fails under vacuum or pressure.
Needle and septum interaction
Use a needle that is straight and undamaged. A bent needle will core the septum and leave a fragment in the vial. Replace needles on the manufacturer’s schedule, and inspect them visually before a high-value run. For methods with many injections, consider a septum with a PTFE facing on the sample side to reduce coring and extractables.
Temperature and pressure limits
Silicone septa are rated to about 200 °C continuous; PTFE-faced septa to about 260 °C for short excursions. If your GC inlet runs at 280 °C, a standard silicone septum will bleed. Match the septum temperature rating to the inlet temperature, not the oven temperature. For pressure, screw caps with a properly compressed septum hold to about 30 psi; crimp caps to higher, but the vial itself becomes the limiting factor.
Troubleshooting checklist: when the closure is the suspect
When an autosampler or inlet problem appears, work through this list before you blame the instrument. In my experience, the closure is the cause more often than the service engineer is.
- Vial not detected or dropped by gripper. Measure cap OD on 10 caps. Check for a cap that is 0.2 mm or more oversized or undersized. Check tray nest for debris or a bent spring.
- Injection volume RSD above 1 percent. Check that the vial is seated flat in the tray and that the cap is not loose. A loose cap lets the vial rock during aspiration.
- Leak at the inlet or in the sample loop. Check septum compression. A septum that is too thin (under 0.9 mm) will not seal; one that is too thick (over 1.2 mm) may prevent the needle from seating.
- Ghost peaks or siloxane background. Check septum temperature rating against inlet temperature. Replace with a PTFE-faced septum if running above 250 °C.
- Needle bending or coring. Check septum durometer and needle straightness. A septum that is too hard for the needle gauge is a common cause.
- Cap cracking after crimping or tightening. Check torque and crimp depth. Over-crimping is the usual culprit on crimp caps; over-tightening on screw caps.
For a broader set of troubleshooting resources, the technical library at Restek technical resources for chromatography has good material on inlet and septum issues that complements what is here. And if you are validating a method and need to document the closure qualification, the analytical testing resources at Analytical Testing cover the method validation side.
Recommendation: a qualifying protocol you can run this week
Here is what I would do if I were setting up a new platform or qualifying a new closure supplier. It takes about half a day and saves weeks of grief.
- Pull the instrument manual and write down the vial dimensions, maximum cap OD, maximum total height, and septum thickness range. These are your acceptance criteria.
- Order a sample pack of candidate closures from at least two suppliers. Get the certificate of analysis with cap OD, septum thickness, and durometer.
- Measure 10 caps and 10 septa per lot with a caliper and micrometer. Reject any lot with a cap OD outside 9.0 ±0.1 mm or a septum thickness outside 1.0 ±0.1 mm.
- Assemble 20 vials with your target torque (0.4 to 0.6 N·m) and run them through the autosampler on a blank method. Watch for gripper drops, vial-not-detected errors, and height clearance issues.
- Run a puncture trial with your actual needle and injection depth. Inject the same vial five times and check for leak, coring, and RSD. A good septum holds three clean punctures with RSD under 1 percent.
- Run a temperature and pressure trial at your inlet conditions. Check for septum bleed with a blank injection and compare against a known-good lot.
- Document the qualified lot with the measured dimensions, the supplier CoA, and the trial results. Use this as the reference for future incoming inspection.
The concrete parameters to carry forward: 9.0 mm cap OD, GPI 12-425 thread, 32.0 mm assembled height, 1.0 mm septum thickness, Shore A 45 to 55 durometer, 0.4 to 0.6 N·m torque, 200 °C continuous rating for silicone septa, and a minimum of three clean punctures per septum. If a closure meets those numbers and your autosampler trial passes, you have a qualified part. If it does not, no amount of price negotiation makes it a good buy.
For the full range of closure formats and the dimensional drawings that go with them, the catalog at Chromatography Consumables is worth bookmarking. But the selection work is yours: the instrument manual and a caliper will tell you more about whether a closure fits than any catalog description. Match the dimensions to the hardware first, and the chemistry will follow.
The takeaway is simple. A vial closure is a mechanical interface with a small number of critical dimensions, and every one of them has to match the autosampler and inlet it feeds. Measure the cap OD, the assembled height, and the septum thickness before you buy, qualify the lot against your actual instrument, and write the acceptance numbers into your incoming inspection procedure. Do that, and the closure stops being the variable you cannot explain when the RSD drifts or the gripper drops a vial at 3 a.m.
References & further reading
Related resources from our lab consumables network:
- Vial Closures at vialsclosures.com
- Analytical Testing at testinganalytical.com
- Hplc Vial at vialforhplc.com
- Chromatography Consumables at chromatographyconsumables.com
External references and standards: