
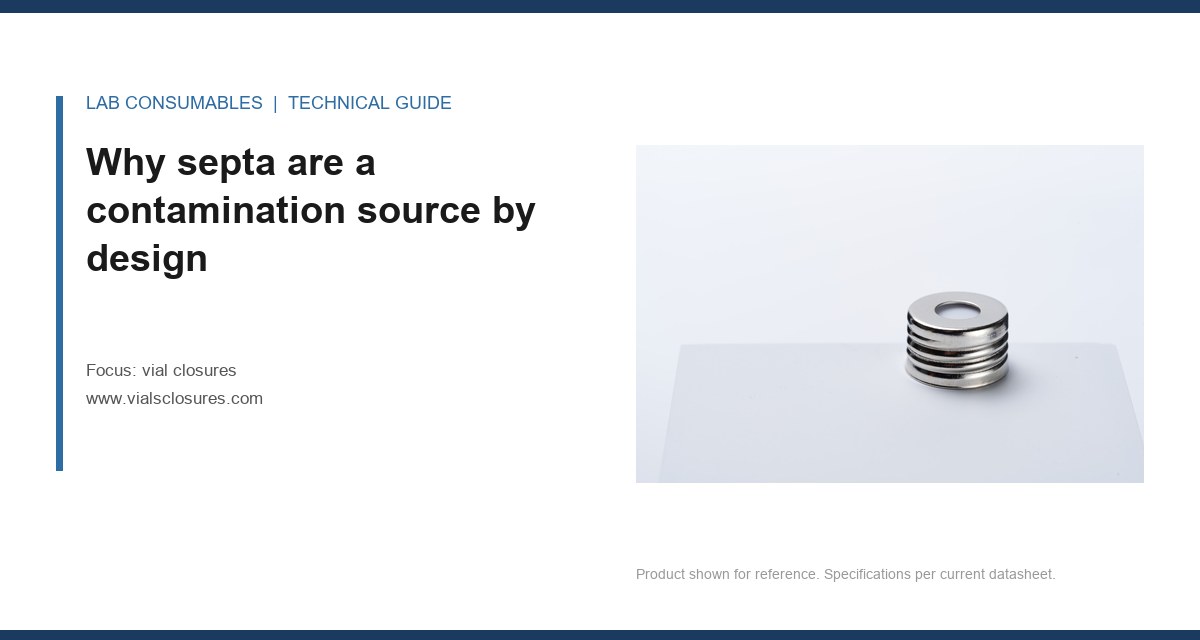
I lost three weeks of method development time in 2019 chasing a peak that did not exist. It showed up at 8.3 minutes on a 30 m × 0.25 mm × 0.25 µm DB-5 column, ran at about 40% of the internal standard area, and appeared in every blank I injected. I replaced the liner, baked the column, swapped the syringe, and even replaced the septum on the inlet. It was the vial closure. Specifically, it was the silicone layer of a 11 mm crimp septum that had been sitting open in a tray for six months, and it was off-gassing a siloxane oligomer into the headspace of every vial I prepared. That experience reshaped how I think about closure contamination, and it is the reason I now insist on lot-level qualification of septa before anyone on my team runs a validated method.
Contamination from vial closures is not a rare event. It is a predictable consequence of what septa are made of, how they are stored, and how they are handled between the box and the autosampler. This article is about diagnosing it, fixing it, and preventing it in the first place. I will give you the specific failure modes, the numbers I use for acceptance, and a checklist you can hand to a technician.
A septum is not inert. It cannot be. It has to seal against a needle puncture, reseal after withdrawal, and remain flexible enough to compress against a vial crown or a screw thread. The materials that do this are elastomers, and elastomers are formulated with plasticizers, curing agents, antioxidants, and fillers. Every one of those can migrate.
The most common construction for HPLC and GC septa is a silicone rubber disc bonded to a PTFE film on the sample side. The PTFE is the barrier. Silicone provides the elasticity and reseal. When the PTFE is intact and the correct grade, it is close to inert for most reversed-phase and GC work. When the PTFE is damaged, contaminated, or absent (as in many cheap “silicone-only” septa sold for GC), the silicone is directly exposed to your sample and to the headspace above it.
Silicone rubber is a polydimethylsiloxane (PDMS) network. Under heat, and especially under the inlet temperatures used in GC (250 to 300 °C), residual low-molecular-weight siloxanes can volatilize. The classic siloxane pattern in GC-MS at m/z 73, 147, 207, 221, 281, and 341 is the fingerprint of this. If you see that pattern growing over a run sequence, you are looking at your septum, not your column.
What the plasticizers and curing agents do
Beyond siloxanes, septa can release:
- Phthalates and adipates from plasticized formulations. These show up as late-eluting peaks in GC and as baseline rise in HPLC with UV detection around 220 to 254 nm.
- Antioxidants and stabilizers such as hindered phenols. These are usually low-level and appear as small, consistent peaks.
- Sulfur compounds and peroxides from certain cure systems. Peroxide-cured silicone can leave trace residues that react with analytes, especially in sulfur-sensitive methods.
- Particulates from the septa surface and from the die-cut edges. These are the ones that plug frits and damage columns.
The practical consequence is that a septum is a small, hot, semi-permeable membrane sitting directly above your sample. What it releases goes into the headspace, and from the headspace into the needle, and from the needle into the inlet.
The two contamination pathways: extractables and volatiles
It helps to split the problem in two, because the fixes are different.
Pathway 1: extractables (liquid contact)
This is what happens when the sample touches the septum. In a crimp vial, the sample should not touch the septum unless the vial is overfilled or the septum is pushed down during crimping. In a screw-thread vial, the sample contacts the PTFE face if the vial is inverted or shaken hard. In headspace and in SPME, the septum is exposed to hot vapor for the entire equilibration and injection cycle, which is effectively extractive contact.
Extractables show up as peaks that scale with contact time and temperature. If your peak grows when you increase headspace incubation from 10 to 30 minutes, you are looking at extractables from the closure, not from the sample.
Pathway 2: volatiles and outgassing (headspace transfer)
This is the ghost peak problem. The septum releases compounds into the headspace of the vial, and those compounds travel with the sample into the inlet. This happens even when the sample never touches the septum. It is worse at high temperature and worse with thin or damaged PTFE.
Ghost peaks from this pathway have a few signatures I look for:
- They appear in method blanks and in solvent-only injections.
- They are absent when the same solvent is injected from a sealed ampoule or a different closure type.
- They increase with inlet temperature and with vial oven temperature.
- They have the siloxane m/z pattern (73, 147, 207) on GC-MS.
- They correlate with septum lot, not with sample lot.
Diagnosing ghost peaks: a decision tree I actually use
When a ghost peak appears, I run this sequence before touching the column. It takes about 90 minutes and it has saved me from replacing columns that were fine.
Step 1: confirm the closure is the source
Prepare four vials of the same solvent (I use HPLC-grade methanol or acetonitrile, depending on the method):
- Vial A: current closure, current lot.
- Vial B: current closure, a different lot from the same supplier.
- Vial C: a known-clean closure from a different supplier, ideally a molded PTFE/silicone with a documented extractables profile.
- Vial D: no closure; inject directly from a sealed ampoule or a syringe.
Inject each three times. If the ghost peak is present in A and B but not C or D, the closure is the source. If it is present in all four, look at the inlet, the liner, the syringe, and the carrier gas. If it is present in A and B but also in C, you may have a batch-wide problem or a handling problem, not a supplier problem.
Step 2: temperature dependence
Run the same vials at inlet temperatures of 200 °C, 250 °C, and 280 °C. Volatile outgassing from septa scales strongly with temperature. If the peak area roughly doubles between 200 and 250 °C, it is almost certainly a septum volatile. Sample-derived peaks usually scale less steeply.
Step 3: PTFE integrity check
Inspect the septum under a low-power microscope or a loupe (10x is enough). Look for:
- Pinholes or crazing in the PTFE film.
- Delamination at the PTFE/silicone bond line, which appears as a whitish halo around the puncture zone.
- PTFE thickness variation; good septa have a PTFE layer of about 0.05 to 0.13 mm (2 to 5 mil).
- Die-cut burrs at the edge, which shed particles into the vial.
If the PTFE is compromised, the septum is compromised. Discard the lot.
Step 4: mass spectrometry confirmation
If you have GC-MS, run a blank and look for the siloxane series. The ions at m/z 73, 147, 207, 221, 281, and 341 are diagnostic. A clean blank should have these at or below the limit of detection for your method. If they are present at significant area, the septum is the source, full stop.
Comparison: closure types and their contamination risk
Not all closures carry the same risk. Here is how I rank them for a typical HPLC or GC application, with the numbers I use in selection.
| Closure type | PTFE thickness (mm) | Typical max temp (°C) | Puncture count (before reseal fails) | Contamination risk | Best use |
|---|---|---|---|---|---|
| 11 mm crimp, PTFE/silicone | 0.05 to 0.13 | 200 to 250 (silicone limit) | 3 to 5 | Low to moderate | GC, headspace, routine HPLC |
| 11 mm crimp, PTFE/silicone/PTFE (sandwich) | 0.05 to 0.13 each side | 200 to 250 | 3 to 5 | Low | Trace analysis, low-level GC-MS |
| 9 mm screw, PTFE/silicone | 0.05 to 0.13 | 200 to 250 | 5 to 8 | Low to moderate | HPLC autosamplers |
| 9 mm screw, silicone-only (no PTFE) | n/a | 180 | 3 to 5 | High | Not recommended for trace work |
| 18 mm headspace, PTFE/silicone | 0.10 to 0.20 | 250 to 300 | 2 to 3 | Moderate at high temp | Headspace GC |
| Molded PTFE/silicone, low-extractable grade | 0.10 to 0.20 | 250 to 300 | 3 to 5 | Low | Validated methods, regulated work |
The takeaway from that table: if you are running trace analysis and you are using silicone-only septa, you have already found your ghost peak. Switch to a PTFE-faced septum and rerun the blank.
Storage and handling: the failure modes nobody talks about
Most contamination I have seen did not come from the factory. It came from the shelf, the bench, or the autosampler tray.
Storage
Septa absorb volatiles from the environment. A box of septa stored next to a solvent cabinet, an open bottle of toluene, or a degreaser will pick up those compounds. I have seen ghost peaks from septa stored in a lab that shared a wall with a paint shop. Store septa in their original sealed bag, at 15 to 25 °C, away from solvents and out of direct sunlight. Do not store opened bags for more than 6 months; after that, the PTFE can develop microcracks and the silicone can absorb ambient volatiles.
Handling
Gloves matter. Nitrile gloves are fine, but powdered gloves are not. Talc and powder residues transfer to the PTFE face and show up as particulates and as small peaks. I insist on powder-free nitrile and I change gloves before handling septa for trace work. Tweezers are better than fingers; the oil on your skin is a contamination source you cannot see.
Crimping torque and compression
Over-crimping is a quiet killer. For 11 mm aluminum crimp seals, the target is a crimp that holds the vial without deforming the septum. I use a crimper setting that gives a seal height of about 5.5 to 6.0 mm for a 11 mm vial with a 1 mm thick septum. If the crimp is too tight, the septum is compressed beyond its elastic limit, the PTFE wrinkles, and the reseal after puncture fails. If it is too loose, the vial leaks and the headspace composition changes. Either way, you get inconsistent results and, in the loose case, you also get sample loss and contamination from the environment.
For 9 mm screw caps, hand-tight plus a quarter turn is the rule. Torque values vary by cap design, but for most 9 mm screw caps I target 0.4 to 0.8 N·m. Over-tightening deforms the PTFE and can crack the cap. Under-tightening leaks. If you have a torque wrench, use it for method validation; if you do not, train your technicians on a consistent hand-tight standard and audit it.
Autosampler tray dwell time
This is the one that catches people. A vial sitting in the autosampler tray for 8 hours at 10 °C is not the same as a vial injected immediately. Septa outgas over time, and the headspace above the sample equilibrates with the septum. If your ghost peak grows with tray dwell time, you have a closure problem. I limit tray dwell to 4 hours for volatile methods and 8 hours for non-volatile methods, and I validate that limit during method development.
Operational precautions: what I actually do
Here is the list I give to every new analyst on my team. It is not exhaustive, but it covers the failures I have seen most often.
- Qualify every lot. Before a new lot of septa goes into a validated method, run a blank injection from three vials from that lot. Accept only if the ghost peak area is below the method’s reporting limit for the target analytes.
- Use PTFE-faced septa for trace work. Silicone-only septa are for general purpose and non-trace work. Do not use them for GC-MS or for HPLC at low wavelengths.
- Check PTFE integrity on receipt. Inspect a sample of 10 septa per lot under a loupe. Reject the lot if more than one shows pinholes or delamination.
- Do not reuse septa. Puncture counts are real. After 3 to 5 punctures, a 11 mm septum leaks. After 5 to 8 punctures, a 9 mm screw septum leaks. Replace the closure, not just the vial.
- Match septum to temperature. Standard silicone is good to about 200 to 250 °C. For headspace at 250 to 300 °C, use a high-temperature grade with a thicker PTFE face (0.10 to 0.20 mm).
- Store correctly. Sealed bag, 15 to 25 °C, away from solvents, use within 6 months of opening.
- Control crimp height. Target 5.5 to 6.0 mm for 11 mm crimp vials. Audit monthly.
- Control tray dwell. Limit to 4 hours for volatile methods.
- Run a closure blank in every sequence. One vial of solvent with the same closure as the samples. If the blank is clean, you have confidence. If it is not, you have a diagnosis.
Troubleshooting checklist
When you have a ghost peak or a contamination event, work through this in order. Do not skip steps.
- Isolate the source. Run the four-vial test (current lot, alternate lot, alternate supplier, no closure). This tells you whether the closure is the source.
- Check the blank. If the blank is clean and the sample is not, the closure is probably not the source. Look at the sample matrix, the syringe, and the inlet.
- Inspect the septum. Loupe inspection for pinholes, delamination, and edge burrs. Reject if compromised.
- Check the temperature. Rerun the blank at 200, 250, and 280 °C. A steep temperature dependence points to a septum volatile.
- Confirm with MS. Look for the siloxane ions at m/z 73, 147, 207. If present, the septum is the source.
- Check the crimp. Measure seal height. Target 5.5 to 6.0 mm for 11 mm crimp vials. Over-crimping deforms the septum; under-crimping leaks.
- Check tray dwell. If the ghost peak grows with time in the autosampler, the closure is outgassing. Reduce dwell time or change the closure.
- Check storage. Was the bag opened more than 6 months ago? Was it stored near solvents? Replace the lot.
- Qualify the replacement lot. Three blank injections. Accept only if the ghost peak is below the method reporting limit.
- Document. Record the lot number, the supplier, the closure type, the PTFE thickness, and the blank result. This becomes your qualification record for the next lot.
Selection criteria: what to specify when you buy
If you are writing a specification for vial closures, here is what I put in it. These are the parameters that actually affect contamination.
- PTFE face thickness: 0.05 to 0.13 mm for routine HPLC and GC; 0.10 to 0.20 mm for headspace and high-temperature work.
- PTFE grade: virgin PTFE, not reprocessed. Reprocessed PTFE can contain residual contaminants from the recycling stream.
- Silicone grade: platinum-cured, medical-grade or analytical-grade. Avoid peroxide-cured silicone for trace work.
- Extractables: request an extractables profile from the supplier. For regulated work, the profile should cover the solvents and temperatures in your method.
- Dimensional tolerance: septum diameter within ±0.1 mm of the nominal (11.0 mm for 11 mm crimp; 9.0 mm for 9 mm screw). Thickness within ±0.02 mm.
- Closure standard: for crimp vials, specify GPI 11 mm (the Glass Packaging Institute standard for 11 mm crimp finishes). For screw vials, specify 9 mm per the vial manufacturer’s drawing. For headspace, 18 mm or 20 mm per the autosampler manufacturer.
- Lot traceability: every box should carry a lot number that maps to the silicone batch and the PTFE batch.
If you want to see how these specifications map to actual products, the Vial Closures catalog at vialsclosures.com is organized by closure type and includes dimensional drawings. For method-level qualification, the resources at Analytical Testing cover blank injection protocols that I have found useful.
When the closure is not the problem
I want to be honest about this: not every ghost peak comes from the closure. Before you spend money on new septa, rule out the other suspects.
Inlet septum. The septum on your GC inlet is a much larger contamination source than the vial septum, and it is punctured hundreds of times per sequence. If your ghost peak appears only on GC and not on HPLC, check the inlet septum first. Replace it every 100 to 200 injections and use a low-bleed grade.
Liner and glass wool. A dirty liner with degraded glass wool releases siloxanes and sample residue. Replace every 100 to 200 injections or when you see peak shape changes.
Syringe and needle. A worn syringe barrel or a bent needle can carry over sample and can also shed particles. Check the needle for burrs and replace the syringe every 1,000 to 2,000 injections depending on the sample matrix.
Carrier gas and traps. A saturated gas trap releases hydrocarbons and oxygen. Check trap life against the manufacturer’s spec and replace on schedule.
Column bleed. A column that is near the end of its life bleeds siloxanes that look exactly like septum volatiles. If the bleed is present even with a clean blank and a new septum, the column is the source. Run a column bake-out and compare.
The point is not that the closure is always guilty. The point is that the closure is the easiest suspect to test, and the four-vial test takes 90 minutes. Do it first. If you want a broader view of how sample handling components interact, the HPLC vial resources cover the vial side of the equation, and the Chromatography Consumables catalog is a useful reference for cross-checking part numbers and materials.
Regulatory and method context
If you are working under a regulated method, the closure is part of your sample handling procedure and should be documented as such. For environmental work, the U.S. EPA SW-846 test methods define sample preservation and holding times, and your closure choice has to be compatible with those. For pharmaceutical work, USP <661> covers containers and closures, and USP <1663> and <1664> address extractables and leachables assessment. If your method is validated, changing the closure type is a change that may require revalidation, at least for the blank and the system suitability check.
The practical rule I follow: any closure change in a validated method triggers a blank injection and a system suitability run, and if the blank is not clean, the change is rejected. That is a low bar, and it catches most problems.
What I recommend
For most labs running HPLC or GC with trace-level detection, the right closure is a PTFE-faced silicone septum with a PTFE thickness of 0.05 to 0.13 mm, a virgin PTFE grade, and a platinum-cured silicone. For headspace and high-temperature work, move to 0.10 to 0.20 mm PTFE and a high-temperature grade rated to 250 to 300 °C. For 11 mm crimp vials, target a seal height of 5.5 to 6.0 mm; for 9 mm screw caps, 0.4 to 0.8 N·m. Replace septa after 3 to 5 punctures for crimp and 5 to 8 for screw. Store sealed, 15 to 25 °C, use within 6 months of opening. Run a closure blank in every sequence.
If you are seeing ghost peaks and you have not yet run the four-vial test, that is your next step. It is cheap, it is fast, and it will tell you more than any amount of column baking. For a deeper look at the components themselves, the Agilent chromatography consumables and columns pages and the Thermo Fisher chromatography and sample handling resources are useful for cross-referencing part numbers and specifications. The Restek technical resources have good background on siloxane bleed and septum selection, and I recommend them to anyone building a blank-injection protocol.
The takeaway: a ghost peak from a vial closure is not a mystery, it is a material and handling problem with a known set of causes and a known set of fixes. Qualify your lots, specify PTFE thickness and grade, control crimp height and tray dwell, and run the blank. Do those four things and you will spend your time on method development instead of chasing peaks that were never in your sample.
References & further reading
Related resources from our lab consumables network:
- Vial Closures at vialsclosures.com
- Analytical Testing at testinganalytical.com
- Hplc Vial at vialforhplc.com
- Chromatography Consumables at chromatographyconsumables.com
External references and standards: