
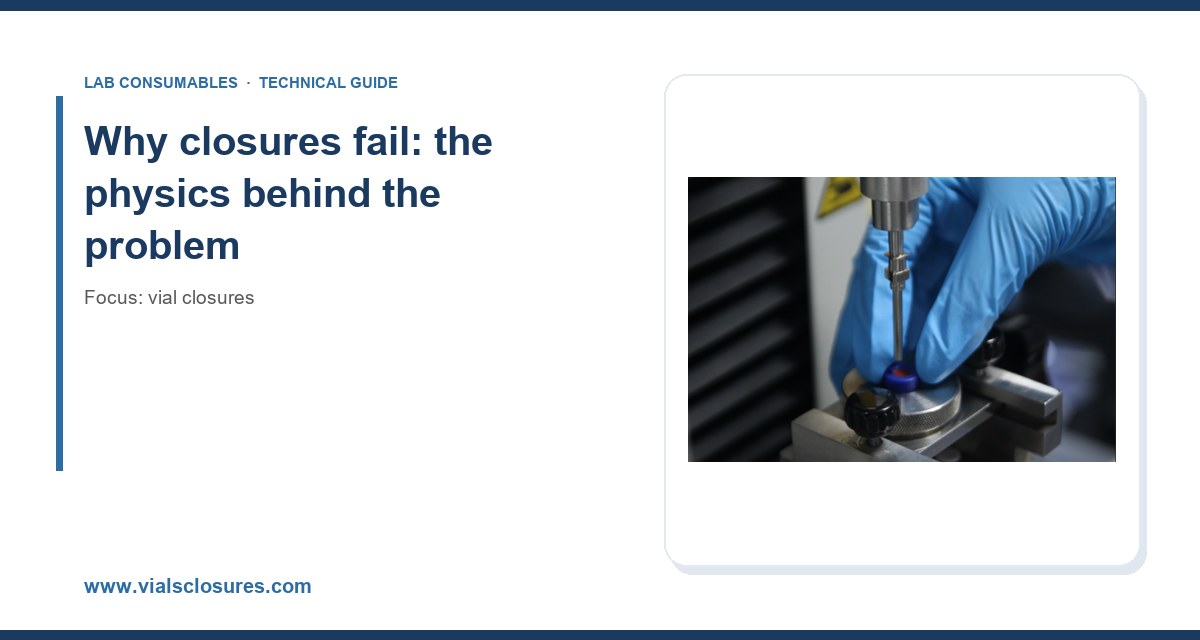
I have spent more mornings than I care to admit chasing a failing autosampler because a vial cap was not crimped squarely. The symptom was always the same: intermittent “no sample” errors, a bent needle, and a chromatogram full of ghost peaks. Nine times out of ten the closure was the culprit, not the instrument. This article collects the closure failures I see most often in daily lab use, the root causes behind them, and the fixes that actually hold up.
A vial closure is a mechanical seal that has to do three jobs at once: hold liquid and vapor inside, let a needle in and out without coring, and stay chemically inert against whatever is in the vial. Most failures trace back to one of those three jobs being compromised by geometry, material, or handling.
The seal itself is a thin elastomer disc, usually 3.0 mm thick and 6.0 mm in diameter for a standard 2 mL vial with an 11 mm crimp or snap cap. When the cap is seated, that disc compresses by roughly 20 to 30 percent. That compression is what generates sealing force. If the compression is uneven, because the cap is cocked or the crimp is lopsided, the seal leaks at the high side and over-compresses at the low side. Over-compression crushes the disc, shortens its service life, and creates a path for coring.
I keep a small box of failed closures on my bench as teaching material. The most common artifacts are a disc with a permanent dimple, a disc with a needle-shaped plug missing, and a cap with a crimp skirt that is visibly asymmetric. Each one tells a story about how it was installed or used.
The seven failures I see most often
1. Coring: the needle punches a plug out of the septum
Coring is the single most common closure failure. A blunt or badly bevelled needle punches a small disc of elastomer out of the septum, and that plug either falls into the sample or lodges in the needle. The result is a blocked needle, a contaminated sample, and a chromatogram with a new peak you cannot identify.
Root causes fall into three buckets. First, needle geometry: a 22-gauge needle with a point style 2 (bevelled, sharp) cores far less than a blunt point style 3 or point style 5. If your method uses a blunt needle for a pre-slit cap, you are asking for trouble. Second, septum durometer: a 50 Shore A silicone disc cores more readily than a 45 Shore A silicone or a 55 Shore A PTFE-faced silicone. Third, the number of punctures the septum has already seen. A standard silicone/PTFE septum is rated for roughly 3 to 5 punctures before coring risk climbs. A pre-slit septum extends that to 10 to 15 punctures, but only if the slit is oriented to the needle path.
The fix is straightforward. Match needle point style to septum type, keep puncture counts below the rated limit, and use pre-slit septa for methods that re-inject from the same vial. If you are running a HPLC vial method with multiple injections per vial, pre-slit septa are not optional.
2. Evaporation and sample loss
A closure that does not seal lets solvent escape. In a 2 mL vial with 1.5 mL of acetonitrile, a leaking closure can lose 2 to 5 percent of the sample volume in 24 hours at room temperature, and much more in a heated autosampler tray. The chromatographic effect is a creeping concentration increase that ruins calibration curves and makes quantitation unreliable.
The usual culprits are a septum that is too thin for the cap, a cap that is not fully seated, or a crimp that has loosened. I have also seen septa swell from solvent contact and lose compression. Silicone swells in toluene and dichloromethane; PTFE-faced septa resist swelling but the facing can delaminate if the bond is poor. For aggressive solvents, use a PTFE/silicone septum with a bonded facing, not a laminated one.
The check is simple: weigh a filled, capped vial, leave it in the autosampler tray for 24 hours, and weigh it again. A loss above 0.5 percent by mass means the closure is not holding. That test takes five minutes and has saved me more than one failed sequence.
3. Crimp failures: loose, cocked, or over-crimped caps
Crimp caps fail in two directions. Under-crimping leaves the cap loose, so the seal never compresses and the vial leaks. Over-crimping crushes the septum and deforms the cap skirt, which can crack the glass neck or make the cap impossible to remove without breaking the vial. The sweet spot is a crimp that rolls the aluminum skirt evenly around the neck with a consistent crimp diameter.
For an 11 mm crimp vial, the target crimp diameter is typically 10.5 to 10.8 mm measured across the crimped skirt, and the crimp height should be 5.5 to 6.0 mm. A manual crimper with a worn jaw will drift outside that window within a few hundred vials. I check crimp diameter with a go/no-go gauge every 200 vials and re-set the crimper when it drifts. An electronic crimper that measures crimp height and applies a set force pays for itself in a high-throughput lab.
The other crimp failure is the cocked cap: one side seated, the other lifted. It happens when the vial is not fully bottomed in the crimper nest. The seal leaks on the lifted side, and the sample evaporates. Visual inspection catches most cocked caps, but a quick check with a straightedge across the cap top is faster and more reliable.
4. Septum push-through and needle damage
A septum that is too soft or too thin can be pushed into the vial by the needle, especially on the first puncture. The septum then floats in the sample, and the needle hits it on the next injection. The result is a bent needle, a crashed run, and a sample that is now contaminated with elastomer.
Push-through is most common with thin septa (under 2.5 mm) and with caps that do not retain the septum properly. It is also common with snap caps where the septum is held only by friction. The fix is to use a septum thick enough for the cap design and to confirm the septum is fully seated before capping. For snap caps, press the cap down until you feel or hear the snap; a partial snap is a push-through waiting to happen.
Needle damage from push-through is expensive. A replacement autosampler needle runs $150 to $400 depending on the instrument, and the downtime is worse than the part cost.
5. Chemical incompatibility and extractables
Not every septum is compatible with every solvent. Silicone is fine for aqueous samples and most alcohols but swells badly in chlorinated solvents and aromatics. Natural rubber and butyl rubber are inexpensive but shed extractables that show up as ghost peaks in sensitive methods. PTFE is nearly inert but has poor resealing after puncture, so it is usually bonded to silicone for the best of both.
Extractables are a real analytical problem. A low-quality septum can leach plasticizers, antioxidants, and curing agents into the sample, producing peaks that interfere with trace analysis. For methods running at ppb levels, use a septum certified for low extractables and run a blank vial through the method before committing a sequence. If you see peaks in the blank that are not in your standard, the closure is a prime suspect.
Compatibility is also a temperature question. Standard silicone/PTFE septa are rated to about 200°C for short excursions, but sustained use above 150°C accelerates compression set and shortens seal life. For high-temperature GC methods, use a high-temperature septum rated to 250 to 300°C and accept the higher cost.
6. Cap loosening during transport and storage
Screw caps back off. Vibration during shipping, thermal cycling in a refrigerator, and simple handling all loosen a screw cap over time. A cap that has backed off by even a quarter turn can leak enough to change sample concentration. I have seen a shipment of standards arrive with 10 percent of the caps loose enough to fail a leak check.
The fix is a cap with a positive stop and a thread design that resists back-off, plus a torque check at packing. For 9 mm screw-thread vials, the target torque is roughly 0.5 to 0.8 N·m; for 13 mm and 18 mm caps, higher. Overtightening strips threads or cracks the neck, so a torque screwdriver set to the low end of the range is better than hand-tightening. I also recommend a shrink band or a tamper-evident seal for shipments that matter.
7. Glass neck damage and dimensional mismatch
Closures are only as good as the vial they seal. A chipped or out-of-round neck will not seal no matter how good the cap is. Glass neck dimensions are specified by standards: GPI 11 mm for crimp and snap vials, GPI 9 mm for screw-thread vials, and the neck finish dimensions are covered under ISO 4796 for laboratory glassware. A vial whose neck is outside the tolerance will leak with a perfectly good cap.
I inspect incoming vials for neck chips and out-of-round necks with a simple gauge and a visual check under a magnifier. Rejecting a bad lot at receiving is far cheaper than discovering it after a failed sequence. The vial closures you buy are only half the system; the vial neck is the other half.
Comparison: closure types and where they fail
The table below is the decision checklist I hand to new lab staff. Numbers are typical values for standard 2 mL vials; confirm against your supplier’s specification for your exact part.
- Crimp cap, 11 mm, silicone/PTFE septum: best seal integrity, rated to about 200°C, 3 to 5 punctures. Fails by under- or over-crimping and by coring with blunt needles. Best for GC and high-temperature methods. Requires a crimper and a crimp gauge.
- Snap cap, 11 mm, silicone/PTFE septum: fast to apply, no tooling, rated to about 150°C, 3 to 5 punctures. Fails by partial snap and push-through. Best for low-throughput labs and room-temperature HPLC.
- Screw cap, 9 mm, silicone/PTFE septum: resealable, rated to about 150°C, 5 to 10 punctures. Fails by back-off and over-tightening. Best for sample storage and transport. Target torque 0.5 to 0.8 N·m.
- Pre-slit septum, any cap style: 10 to 15 punctures, lower coring risk, slightly higher evaporation rate. Fails by slit misalignment and by losing seal after many punctures. Best for multi-injection methods.
- High-temperature septum, crimp or screw: rated to 250 to 300°C, 2 to 4 punctures. Fails by compression set at sustained high temperature. Best for high-temperature GC.
If you are unsure which closure fits a method, the cheapest test is to run a blank and a standard through the full sequence with each candidate closure and compare peak area RSD. A closure that is leaking shows up as RSD above 2 percent on replicate injections where the instrument alone gives under 1 percent.
Prevention: the operating procedures that actually work
Match needle, septum, and cap as a system
Do not specify a needle and a septum independently. A 22-gauge bevelled needle with a standard silicone/PTFE septum is a proven combination. A blunt needle needs a pre-slit septum. A 26-gauge needle needs a softer septum or it will bend. Write the combination into the method and do not let it drift.
Control crimp and torque with gauges, not feel
Hand crimping is a skill, and skills drift. Use a go/no-go gauge on crimp diameter every 200 vials and a torque screwdriver on screw caps. Record the readings. When a sequence fails, the log tells you whether the closure was in spec.
Set a puncture limit and track it
Every septum has a puncture budget. Standard silicone/PTFE: 3 to 5. Pre-slit: 10 to 15. Write the limit into the SOP and change the vial when the budget is spent. Re-injecting from a vial that has seen 20 punctures is a coring incident waiting to happen.
Run a leak check on every new lot
Weigh-test a sample of vials from each incoming lot. Fill, cap, weigh, hold 24 hours, weigh again. Reject lots that lose more than 0.5 percent by mass. This one test catches bad septa, bad caps, and bad vials before they reach a sequence.
Store closures correctly
Septa absorb volatiles from the air. A box of silicone septa left open in a lab that handles solvents will pick up contamination. Keep closures in their original packaging, sealed, and use them within the supplier’s shelf life (typically 2 to 3 years for silicone, longer for PTFE). Do not store closures near solvent cabinets.
Troubleshooting checklist
When a sequence fails and you suspect the closure, work through this list in order. It takes about 15 minutes and catches most problems.
- Check the blank. Run an empty capped vial through the method. Ghost peaks point to extractables or contaminated septa.
- Check for coring. Inspect the septum after the run. A missing plug or a needle-shaped hole means the needle and septum are mismatched.
- Check crimp diameter and height. Use a go/no-go gauge. Target 10.5 to 10.8 mm diameter and 5.5 to 6.0 mm height for 11 mm crimp vials.
- Check screw-cap torque. Target 0.5 to 0.8 N·m for 9 mm caps. Re-torque loose caps before transport.
- Check for evaporation. Weigh-test a filled vial after 24 hours in the autosampler tray. More than 0.5 percent loss means a leak.
- Check the vial neck. Look for chips and out-of-round necks. Reject bad lots at receiving.
- Check septum compatibility. Confirm the septum material against the solvent list. Silicone swells in chlorinated solvents; use PTFE-faced.
- Check temperature rating. Confirm the septum rating exceeds the method temperature with margin. Sustained use above 150°C needs a high-temperature septum.
- Check puncture count. Compare against the rated limit. Change the vial when the budget is spent.
- Check needle point style. Blunt needles need pre-slit septa. Bevelled needles work with standard septa.
For methods that involve trace analysis, the closure is part of the analytical system, not an accessory. The analytical testing workflow should include a closure blank and a leak check as standard steps, the same way it includes a system suitability check.
Selection criteria with numbers
When you specify a closure, these are the parameters that matter and the values that work in most labs.
- Neck finish: GPI 11 mm for crimp and snap, GPI 9 mm for screw thread. Confirm against ISO 4796 neck dimensions.
- Septum thickness: 3.0 mm standard for 11 mm caps; 1.0 to 1.5 mm for 9 mm screw caps. Thin septa push through; thick septa core more easily.
- Septum durometer: 45 to 55 Shore A for silicone. Softer cores more easily; harder resists coring but seals less well.
- Temperature rating: standard silicone/PTFE to 200°C short excursion, 150°C sustained. High-temperature septa to 250 to 300°C.
- Puncture rating: 3 to 5 for standard septa, 10 to 15 for pre-slit, 2 to 4 for high-temperature septa.
- Crimp dimensions: 10.5 to 10.8 mm diameter, 5.5 to 6.0 mm height for 11 mm crimp.
- Screw torque: 0.5 to 0.8 N·m for 9 mm caps.
- Leak rate: under 0.5 percent mass loss in 24 hours at room temperature.
For instrument-specific guidance, the vendor technical resources are worth reading: Agilent publishes closure and septum compatibility notes for its GC and LC systems, Thermo Fisher documents autosampler needle and septum combinations, and Restek has a useful guide to septum selection and septa-related artifacts. For regulatory methods, the U.S. EPA SW-846 test methods specify sample container and closure requirements for waste and materials testing that are worth checking before you commit a closure to a regulated method.
If you are building out a full consumables list, the chromatography consumables catalog is a good place to cross-check part numbers and specifications against your method.
Recommendation
For most HPLC and GC labs running 2 mL vials, I recommend an 11 mm crimp cap with a bonded silicone/PTFE septum as the default. It gives the best seal integrity, the widest temperature range, and predictable puncture behavior. Use a calibrated crimper, check crimp diameter every 200 vials against a 10.5 to 10.8 mm go/no-go gauge, and change the vial when the septum has seen 5 punctures. For methods with multiple injections per vial, switch to a pre-slit septum and cap the puncture count at 15. For sample storage and transport, use a 9 mm screw cap torqued to 0.5 to 0.8 N·m and add a tamper-evident seal for shipments. For high-temperature GC, use a septum rated to at least 250°C and accept the shorter puncture budget.
The closure is a small part of the cost per sample, but it is a large part of the failure rate. Treat it as a specified component with dimensions, ratings, and limits, not as a consumable you grab from a drawer. The labs that do this spend less time chasing ghost peaks and more time generating data.
The failures in this article are all preventable with the right specification and a handful of checks at receiving, at capping, and before the sequence. The closure will still fail occasionally, because glass and elastomer are not perfect. But the failures will be rare, and when they happen you will know where to look.
References & further reading
Related resources from our lab consumables network:
- Vial Closures at vialsclosures.com
- Analytical Testing at testinganalytical.com
- Hplc Vial at vialforhplc.com
- Chromatography Consumables at chromatographyconsumables.com
External references and standards: