
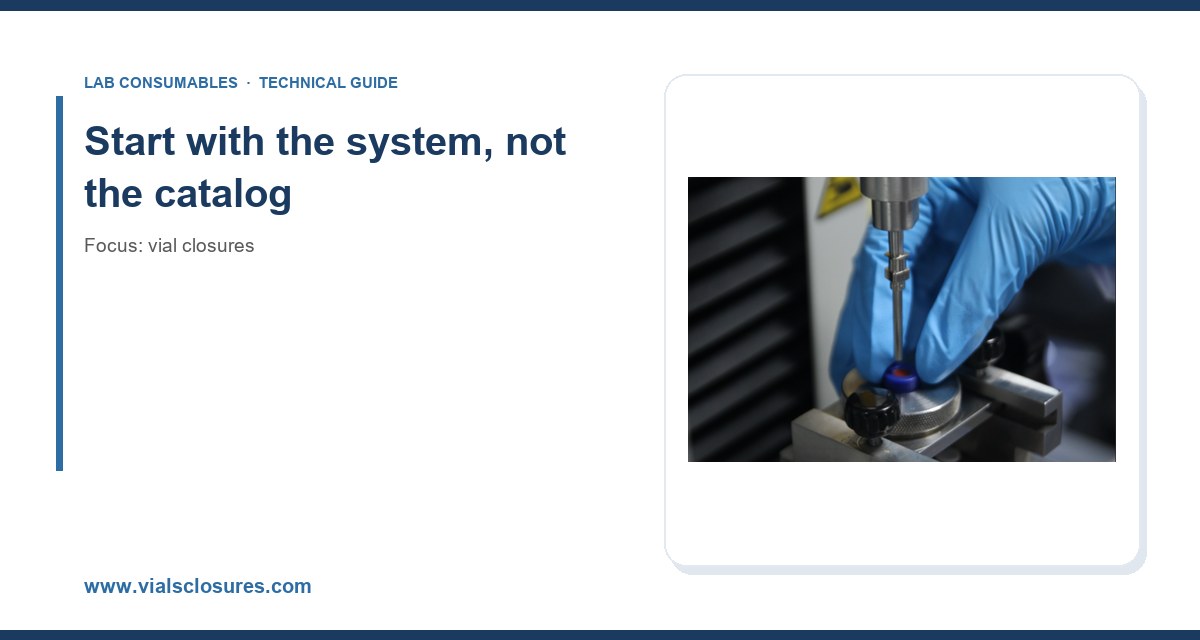
I once watched a lab lose three weeks of stability data because a shipment of 9 mm caps arrived with 1.0 mm thick septa instead of the 1.5 mm the method was validated on. The injections were fine. The problem was that the thinner septa coring punched silicone into the vial, and the resulting extraneous peaks showed up right in the retention window of the degradant we were tracking. Nobody caught it until the audit. That is the whole reason this guide exists: vial closures are the cheapest component in the workflow and the one most likely to quietly wreck it.
What follows is how I specify closures now, after 15 years of buying them, qualifying them, and arguing with suppliers about certificates. It covers dimensions, septa materials, temperature and pressure limits, puncture budgets, torque, and the failure modes that actually show up on a lab bench.
Closures do not exist in isolation. A cap is only correct relative to the vial it seals, the autosampler that grips it, and the detector that has to see through it. Before you look at a price list, write down four things: your vial standard, your autosampler model, your injection volume, and the highest temperature the sample will see.
Most HPLC work in North America and Europe runs on the 12 x 32 mm vial, which is the dominant format for autosamplers from Agilent, Waters, Shimadzu, and Thermo. That vial takes a 9 mm screw thread closure. The other common formats are the 8 mm crimp (11 mm vial), the 11 mm crimp (12 x 32 mm), the 13 mm crimp (16 x 32 mm), and the 18 mm screw cap for 20 mL headspace vials. Get the format wrong and nothing else matters.
Thread standard matters too. The 9 mm screw thread is defined under the GPI 9 mm convention (Glass Packaging Institute), and a compliant cap will have a thread profile that matches the vial neck to within a few hundredths of a millimeter. Cheap non-GPI caps will thread on, but they will not seat to the same depth, and the septum compression will vary from vial to vial. That shows up as injection-to-injection RSD creep, often from 0.5% to 2% or worse on peak area.
Matching closure format to autosampler
- Agilent 1260/1290, 7697A headspace: 12 x 32 mm vial, 9 mm screw or 11 mm crimp depending on tray. Screw caps are the default for most modern installations. See Agilent’s consumables catalog for the exact tray compatibility matrix.
- Waters Alliance/e2695, ACQUITY: 12 x 32 mm, 9 mm screw. Crimp is supported but rarely used.
- Shimadzu SIL-20/30/40: 12 x 32 mm, 9 mm screw. Some older SIL-10 trays need short caps to clear the gripper.
- Thermo autosamplers (Dionex, Vanquish): 12 x 32 mm, 9 mm screw. Thermo publishes a compatibility guide under its chromatography and sample handling pages.
- Headspace (20 mL): 18 mm crimp or 18 mm magnetic screw. Crimp is still the reference for EPA 5021A and most pharmacopeial headspace methods.
If you are running a mixed fleet (very common after an acquisition), standardize on 9 mm screw caps and 12 x 32 mm vials wherever possible. It simplifies inventory and it eliminates an entire class of “why is this tray jamming” calls.
Septum material: the decision that matters most
The septum is where most method problems originate. The cap is just a holder. I have seen labs spend weeks on column chemistry when the real issue was a silicone septum off-gassing at 60 °C.
Silicone (pure or with PTFE facing)
Standard silicone is the workhorse for room-temperature HPLC and most LC-MS work. It reseals well, tolerates multiple punctures (typically 5 to 10 clean punctures on a 1.5 mm thick septum before coring becomes a problem), and is cheap. The problem is that silicone is permeable to oxygen and moisture and it will extract hydrophobic analytes if the sample contacts it directly. That is why almost every silicone septum sold for analytical use has a PTFE film bonded to the sample side.
PTFE-faced silicone is my default for reversed-phase HPLC, LC-MS, and most ambient-temperature work. Specify 1.5 mm thickness for 9 mm caps. Anything thinner is a false economy.
PTFE/silicone laminated (two-piece)
Same idea, but the PTFE is a separate disc rather than a bonded film. Better chemical resistance, worse reseal performance, and the disc can migrate if the cap is over-torqued. I avoid these unless the application demands it (strong acids, some bioanalytical work).
Butyl rubber
Butyl is the standard for pharmaceutical vial closures (the 13 mm and 20 mm formats used with lyophilized drug products). It has low moisture vapor transmission and good reseal after multiple punctures, typically 3 to 5 for a 20 mm lyo stopper. It is not appropriate for most analytical HPLC because extractables are high relative to silicone. If you are doing USP <661> or <381> work, butyl is what the method expects.
Bromobutyl and chlorobutyl
These are formulated butyls used where the drug product is sensitive to specific extractables. Bromobutyl has better heat stability. Chlorobutyl has better chemical resistance. Both are specified by the pharmaceutical customer, not by the analytical lab, and both are expensive (typically 3 to 6x the cost of a standard silicone-lined cap).
EPDM and natural rubber
EPDM shows up in some industrial and environmental applications where cost matters more than extractables. Natural rubber is essentially obsolete for analytical work. I do not recommend either for anything going into an LC-MS.
Pre-slit septa
Pre-slit septa (a small slit cut through the PTFE face) reduce needle coring and are useful for high-puncture-count workflows like 96-well plate autosamplers or long analytical sequences. The trade-off is that the slit is a permanent leak path. For short sequences (under 50 injections per vial) they are fine. For long ones, or for anything volatile, use a solid septum.
Temperature ratings: read the fine print
Every septum has a temperature ceiling, and the ceiling is lower than most people think. The numbers below are practical limits, not the “short excursion” numbers on the datasheet.
- Silicone/PTFE: continuous -40 °C to +200 °C. Above 200 °C the silicone starts to degrade and off-gas.
- PTFE/silicone laminate: -40 °C to +200 °C, but the laminate can delaminate above 150 °C under pressure.
- Butyl: -40 °C to +120 °C. Above 120 °C the rubber softens and the seal fails.
- Bromobutyl: -40 °C to +130 °C.
- EPDM: -50 °C to +150 °C.
If your GC inlet runs at 250 °C, the septum is not at 250 °C. The inlet body is. The septum sits in the inlet nut and sees a temperature gradient, typically 20 to 40 °C cooler than the inlet body. But if the inlet is at 280 °C and the septum is seeing 240 °C, a silicone septum is at the edge of its rating. That is why GC septa are usually a different product from HPLC septa: typically a molded silicone with a specific bleed profile, sometimes with a PTFE facing for the sample side, and specified for up to 350 °C in the inlet. If you are running a high-temperature GC method, do not substitute an HPLC septum.
Pressure and vacuum considerations
Standard 9 mm screw caps with a 1.5 mm silicone/PTFE septum hold pressure to about 1.5 bar (22 psi) without deformation. Above that, the cap skirt can lift and the seal fails. If your method involves pressurized sample introduction (some purge-and-trap, some headspace), specify a cap with a reinforced skirt or a thicker septum.
Vacuum is the opposite problem. Under vacuum (e.g., some SPE workflows), the septum is pulled into the vial. A 1.5 mm silicone septum will deform at about -0.5 bar. Use a PTFE-faced septum with a rigid backing, or a crimp cap with a thicker septum.
For headspace, the 20 mL crimp cap with a 3 mm thick butyl or silicone septum is the reference. The crimp provides mechanical preload that a screw cap cannot match. If you are running EPA 5021A or a similar method, crimp is the safer choice. The EPA SW-846 test methods specify crimp closures for most headspace procedures.
Puncture counts and coring
Coring is the failure mode where the needle punches a small disc of septum into the vial. That disc becomes an extraneous peak, sometimes in the retention window of an analyte of interest. It is the single most common cause of “mystery peak” investigations I have been involved in.
Practical puncture budgets for a 1.5 mm septum:
- Standard silicone/PTFE, sharp needle, 22 gauge: 5 to 10 punctures before coring risk rises.
- Pre-slit silicone/PTFE: 15 to 25 punctures.
- Butyl (20 mm lyo stopper): 3 to 5 punctures.
- Bromobutyl: 5 to 8 punctures.
The needle matters as much as the septum. A blunt or burred needle will core a septum in two punctures. A 22 gauge (0.72 mm OD) needle with a sharp bevel is the reference. If you are using a 26 gauge needle for small-volume injections, coring risk drops but the needle bends more easily. Check needle condition monthly; replace at the first sign of a burr.
Torque and cap seating
This is where operators and buyers disagree most. The spec sheet says “hand tighten.” That is not a specification. Here is what I actually use:
- 9 mm screw caps, silicone/PTFE septum: 0.4 to 0.6 N·m (3.5 to 5.3 in-lb). Above 0.8 N·m the cap skirt deforms and the septum is over-compressed, which causes coring and can crack the vial neck.
- 11 mm crimp caps: 0.8 to 1.2 N·m at the crimper jaw. Under-crimping is more common than over-crimping and causes leaks; over-crimping cracks the vial neck.
- 13 mm crimp caps (pharma): 1.0 to 1.5 N·m, per the crimper manufacturer’s spec.
- 18 mm headspace crimp: 1.5 to 2.0 N·m.
If you are buying a torque tester, buy one. They are cheap relative to the cost of a failed batch. If you are not, at least standardize on a single hand-crimper model and train everyone on it. The variance between operators using “hand tight” is easily 3x, and that variance shows up in your RSD.
Chemical compatibility: the short version
Silicone is compatible with most aqueous and alcoholic solvents, most dilute acids, and most dilute bases. It is not compatible with concentrated acids, strong oxidizing agents, ketones, and some chlorinated solvents. PTFE is compatible with almost everything except molten alkali metals and some fluorinating agents. Butyl is compatible with most aqueous systems and is the standard for pharmaceutical products.
If you are running a method with a solvent you have not used before, do a compatibility check. Put a septum in a vial with the solvent, cap it, and run it through your method’s temperature cycle. Then inject and look for extraneous peaks. Two hours of work saves two weeks of investigation.
Buying decision checklist
This is the checklist I use when qualifying a new closure supplier or a new product line. If a supplier cannot answer these questions with numbers, I do not buy from them.
- Format: 9 mm screw, 11 mm crimp, 13 mm crimp, or 18 mm headspace? Confirm against your vial standard and autosampler.
- Thread standard: GPI 9 mm compliant? Ask for the drawing.
- Septum material: Silicone/PTFE, butyl, bromobutyl, or EPDM? Specify the sample-side facing.
- Septum thickness: 1.5 mm for 9 mm caps, 3.0 mm for 18 mm headspace. Do not accept “standard” as an answer.
- Temperature rating: Continuous and short-excursion. Confirm the numbers against your method’s maximum temperature.
- Puncture count: Ask for the supplier’s tested value and the test method. If they cannot give you a number, assume 5.
- Extractables: Ask for an extractables report. For pharma, ask for USP <661> compliance. For LC-MS, ask for a background scan.
- Certificates: Certificate of analysis per lot? Certificate of conformance? Traceability to resin lot?
- Packaging: Are caps bagged in cleanroom-compatible packaging, or in a cardboard box? For LC-MS work, specify double-bagged.
- Price per 1000: Compare on a per-injection basis, not per-cap. A cheap cap that cores after 3 punctures is more expensive than a good one that lasts 10.
Troubleshooting: the checklist I actually use
When a method goes sideways, I work through this list in order. Most problems are solved by item 3 or 4.
Extraneous peaks in the chromatogram
- Run a blank injection with a new vial and cap from a fresh lot. If the peak disappears, it was the closure.
- Check septum coring: inspect the septum after injection for a punched hole or a missing disc.
- Check septum material: was a silicone septum substituted for a PTFE-faced one? Is the PTFE facing on the sample side?
- Check for off-gassing: run a blank at your method’s maximum temperature. If peaks appear, the septum is degrading.
Injection-to-injection RSD above 1%
- Check torque variance across operators. Standardize on a torque tester.
- Check cap seating depth: is the cap fully threaded? A partially seated cap causes variable septum compression.
- Check for a mismatched cap/vial combination (e.g., a non-GPI cap on a GPI vial).
- Check needle condition. A burred needle causes variable coring.
Sample loss or evaporation
- Check septum integrity. A pre-slit septum is a leak path; use a solid septum for volatile analytes.
- Check cap torque. Under-torqued caps leak at the seal.
- Check temperature. Above the septum’s rating, the seal softens and leaks.
Autosampler jams
- Check cap height. Short caps clear grippers; tall caps can catch.
- Check cap OD. Some non-GPI caps are slightly oversized and jam in the tray.
- Check crimp quality. Over-crimped caps have a wider skirt and jam more often.
Where to buy and what to specify
For most analytical labs, the practical answer is to buy from the same supplier as your vials, so the cap and vial are qualified together. That is the whole reason the vial closures catalog exists: to keep the cap, vial, and septum as a matched set rather than three separate SKUs. If you are sourcing HPLC-specific formats, the HPLC vial resource covers the format compatibility matrix in more detail. For method development and qualification work, the analytical testing side of the network has the extractables and leachables protocols. And for the broader consumables picture (needles, filters, ferrules), the chromatography consumables catalog is the reference I keep bookmarked.
For technical background on septum materials and bleed profiles, Restek’s technical resources are the most useful free reference I have found. Agilent and Thermo both publish compatibility matrices for their autosamplers, and those are worth downloading even if you do not buy their consumables.
When you place an order, specify the following on the PO: format (e.g., 9 mm screw), thread standard (GPI 9 mm), septum material (silicone/PTFE, PTFE on sample side), septum thickness (1.5 mm), temperature rating, lot traceability, and certificate of analysis. If the supplier pushes back on any of those, that is your answer.
Takeaway
Vial closures are the cheapest component in the workflow and the one most likely to cause a failed batch. The selection criteria that matter are format, thread standard, septum material, septum thickness, temperature rating, and puncture count. Get those six right and you eliminate most of the failure modes I have described. Get them wrong and no amount of method development will save the run. Buy on per-injection cost, not per-cap price, and put the specifications on the PO in writing.
References & further reading
Related resources from our lab consumables network:
- Vial Closures at vialsclosures.com
- Analytical Testing at testinganalytical.com
- Hplc Vial at vialforhplc.com
- Chromatography Consumables at chromatographyconsumables.com
External references and standards: