
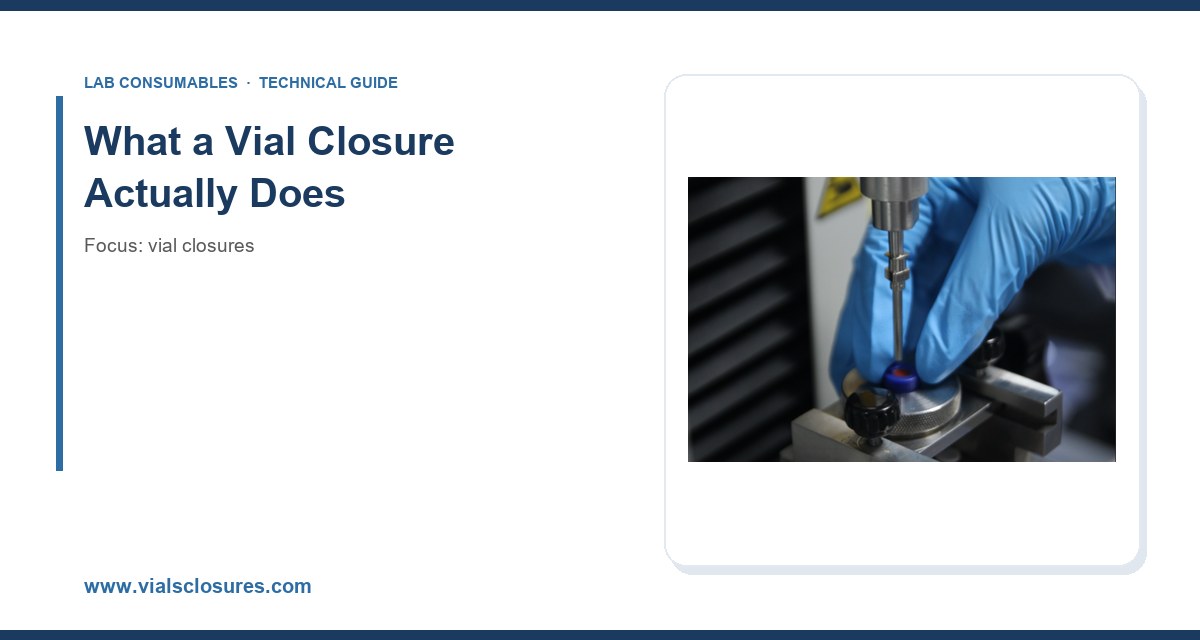
I have watched a validated HPLC sequence fail because a buyer saved four cents per cap on a non-certified closure, and I have watched a production line run for six months on a closure that cost twice as much as it needed to. The difference between those two outcomes was not luck. It was knowing which specifications actually matter for the workflow in front of you.
This guide is the checklist I wish someone had handed me fifteen years ago. It covers the closure anatomy that drives performance, the selection criteria that map to real instruments and real methods, the operating limits you need to respect, and the failure modes that show up in the data before they show up in the lab notebook.
A closure is not a lid. It is a three-part sealing system: the shell (usually aluminium), the septum (silicone, rubber, or a laminate), and the crimp or thread geometry that determines how the seal is formed and how it releases. Get any one of those wrong and you get a leak, a coring event, or a ghost peak at 12.4 minutes that nobody can explain.
Shell and Crimp Geometry
Standard 11 mm crimp closures are the workhorse for 2 mL HPLC vials with a 12 x 32 mm body. The shell is typically 0.25 to 0.30 mm aluminium, and the crimp is formed either by a hand crimper or a pneumatic decapper/crimper set to a defined jaw force. The critical dimension is not the shell diameter but the crimp height and the compression of the septum. A properly crimped 11 mm closure compresses the septum by roughly 30 to 40 percent of its thickness. Under-compress and you leak under autosampler needle pressure. Over-compress and you deform the septum, punch a permanent channel, and shorten the usable puncture count.
For 13 mm and 20 mm closures, the same principle applies with larger tolerances. The 20 mm crimp is common on headspace vials and larger sample containers, and it is far more forgiving of crimper variation, which is one reason headspace methods tolerate hand crimping better than LC methods do.
Septum Materials and What They Do Under Load
The septum is where most selection mistakes happen. The common options:
- Silicone (pure, 50 to 60 Shore A): excellent resealing, low compression set, wide temperature range from about -60 °C to +200 °C. The downside is high gas permeability and extractables if not PTFE-faced.
- PTFE-faced silicone: the default for HPLC and GC autosamplers. The PTFE face resists solvent attack and reduces coring; the silicone body provides the seal. Temperature ceiling is set by the silicone, typically 200 °C.
- Butyl rubber: low gas permeability, good for headspace and short-term storage, but poor resealing after multiple punctures and a temperature ceiling around 120 °C.
- Bromobutyl and chlorobutyl: used where extractables must be minimized, common in pharmaceutical headspace.
- EPDM: good chemical resistance to polar solvents and steam, but swells in nonpolar hydrocarbons.
- Laminated PTFE/silicone/PTFE: the premium option for trace analysis and long sequences, at roughly 1.5 to 2.5 times the cost of single-faced septa.
If you are running trace-level LC-MS or GC-MS, the septum extractables profile matters more than the price. A single-faced septum can shed siloxane oligomers that appear as m/z 281, 327, 355, and 429 background in GC-MS. A laminated septum reduces that background substantially, which is why most validated trace methods specify it.
Matching the Closure to the Workflow
There is no universal closure. There is a closure that fits your instrument, your method, and your sample volume. Work through the following decision points in order.
Step 1: Identify the Vial and the Instrument
Start with the physical interface. A HPLC vial platform typically uses 12 x 32 mm bodies with 11 mm crimp or 9 mm screw-thread necks. The 9 mm screw thread is the short-thread standard popularized for autosamplers, and it uses a 9 mm screw cap with a septum. Confirm the neck finish before you buy anything: a 9 mm cap will not seal a 11 mm neck, and a “universal” cap that claims to fit both is a compromise that usually leaks on one of them.
For GC and headspace, the vial is often 20 mL with a 20 mm crimp neck, and the closure is a 20 mm aluminium crimp with a butyl or PTFE-faced silicone septum. Headspace methods are sensitive to septum permeability because the sample is heated and the headspace gas composition must be stable; butyl is the usual choice, and the temperature ceiling of the method (often 80 to 150 °C) sets the septum grade.
Step 2: Set the Temperature and Pressure Envelope
Write down the maximum temperature the closure will see, including autoclave cycles, sample prep heating, and instrument oven temperatures. Then add a 20 °C margin. A septum rated to 200 °C should not be run continuously at 195 °C; compression set accelerates and resealing degrades. For autoclave cycles at 121 °C for 15 to 20 minutes, use a silicone or PTFE-faced silicone septum and verify the crimp after the cycle, because the aluminium shell anneals slightly and the crimp can loosen.
Pressure matters for headspace and for pressurized sample loops. A properly crimped 20 mm closure holds 1 to 2 bar comfortably; above that, you want a screw-thread closure with a PTFE-lined septum or a specialty pressure-rated cap.
Step 3: Count the Punctures
This is the number most buyers ignore and most operators discover the hard way. A standard PTFE-faced silicone septum in an 11 mm crimp closure typically survives 3 to 5 punctures from a 0.5 to 0.8 mm autosampler needle before coring and leakage become a risk. A laminated PTFE/silicone/PTFE septum can push that to 5 to 8 punctures. A pure silicone septum with a thin PTFE face is closer to 2 to 3.
If your method reinjects the same vial (common in stability studies and in autosampler queues with repeat injections), either budget for single-use closures or specify a laminated septum and validate the puncture count in your own lab. Do not trust the vendor’s number blindly; needle gauge, bevel, and injection speed all change it.
Step 4: Match the Septum to the Detection Limit
For UV detection at 210 to 220 nm, septum extractables are usually below the noise floor if you use a PTFE-faced septum and a clean vial. For LC-MS at low ng/mL, the septum becomes a source. For GC-MS, the septum is a major source of siloxane background. If you are running trace analysis, specify laminated septa and consider pre-cleaning or conditioning the closures before use.
This is where the analytical testing discipline pays off: run a blank injection with your candidate closure before you commit a production lot. A single blank run on your own instrument tells you more than any certificate of analysis. If you need help designing that blank study, the resources at Analytical Testing are a good starting point for method-level validation thinking.
Selection Criteria With Numbers
The table below is the comparison I use when a lab asks me to recommend a closure for a new method. The numbers are typical values; confirm against the vendor’s actual specification and your own validation.
Closure Comparison Checklist
- 11 mm crimp, PTFE-faced silicone, 12 x 32 mm vial: temperature to 200 °C, 3 to 5 punctures, crimp force set so septum compresses 30 to 40 percent, cost index 1.0. Best for routine HPLC-UV and GC-FID.
- 11 mm crimp, laminated PTFE/silicone/PTFE: temperature to 200 °C, 5 to 8 punctures, lowest extractables, cost index 1.8 to 2.5. Best for LC-MS, GC-MS, and validated trace methods.
- 9 mm screw thread, PTFE/silicone: temperature to 200 °C, 3 to 5 punctures, torque 0.4 to 0.6 N·m hand-tight, cost index 1.2. Best for autosamplers that prefer screw caps and for labs that decap and recap.
- 20 mm crimp, butyl or PTFE-faced silicone: temperature to 120 °C (butyl) or 200 °C (silicone), low gas permeability, cost index 1.0 to 1.5. Best for headspace GC.
- 13 mm crimp, silicone: temperature to 200 °C, 3 to 5 punctures, cost index 1.1. Best for larger sample volumes and some clinical platforms.
Torque values for screw caps deserve a note. Hand-tight is not a specification. A 9 mm screw cap should be tightened to roughly 0.4 to 0.6 N·m; a torque screwdriver or a calibrated capper gets you there. Over-torque deforms the septum and can crack the neck; under-torque leaks under autosampler pressure. If you recap vials after sampling, re-torque to the same value, because the thread and septum have already taken a set.
GPI and ISO References
The neck finish on screw-thread vials follows GPI (Glass Packaging Institute) thread specifications, and the dimensional tolerances for vials and closures are covered in the relevant ISO standards for pharmaceutical and laboratory glassware. When you buy, ask for the GPI thread designation and the dimensional tolerance on the neck diameter and thread pitch. A vendor that cannot quote those numbers is not controlling the interface, and the interface is where leaks live.
For chromatography-specific consumables and the instrument-side compatibility data, the vendor technical resources at Agilent, Thermo Fisher, and Restek are worth bookmarking. Restek in particular publishes septum and inlet maintenance guidance that maps directly to closure selection for GC.
Operational Precautions That Save Runs
Selection gets you a good closure. Operation keeps it good. These are the precautions I enforce in my own labs.
Crimping and Decapping
Use a crimper with adjustable jaw depth and check it against a go/no-go gauge every shift. A crimper that is 0.1 mm out of adjustment will either leak or crush the septum, and the failure is silent until the autosampler reports a short injection. Decap with a proper decapper, not a screwdriver; prying a crimp off distorts the neck and the next crimp will not seal.
Needle and Autosampler Settings
Set the needle penetration depth so the needle passes through the septum and stops 1 to 2 mm above the vial bottom, not touching it. A needle that bottoms out bends, and a bent needle cores the septum on the next injection. Use a 0.5 to 0.8 mm needle for LC and confirm the autosampler’s injection speed; fast injections on a soft septum increase coring.
Storage and Lot Control
Store closures in the original sealed bag, away from solvents and UV, at 15 to 25 °C and below 60 percent RH. Silicone septa absorb volatiles from the lab atmosphere; a bag left open next to a solvent tray will show up as ghost peaks. Track lot numbers and keep a retention sample from each lot, because when a mystery peak appears, the first question is always “did the closures change?”
Compatibility With Sample Chemistry
Check solvent compatibility before you commit. PTFE faces resist most solvents, but the silicone body swells in toluene, dichloromethane, and hexane. Butyl is poor with ketones and chlorinated solvents. EPDM swells in nonpolar hydrocarbons. If your sample matrix is aggressive, specify a laminated or fully PTFE-faced septum and validate a 24-hour contact test at your method temperature.
Troubleshooting Checklist
When a run goes wrong, work through this list in order. It resolves most closure-related problems in under an hour.
- Short injection or low response: check crimp height and septum compression first, then needle depth. A leak at the septum shows as a low peak with normal retention time.
- Ghost peaks or rising baseline: run a blank with the suspect closure lot. Siloxane peaks at m/z 281, 327, 355, 429 point to septum bleed.
- Coring (visible hole or plug in the vial): reduce needle gauge, slow injection speed, increase puncture budget, or switch to laminated septum.
- Septum pushed into the vial: under-crimped closure or wrong shell height. Recheck crimper adjustment against the go/no-go gauge.
- Leak under headspace pressure: verify 20 mm crimp compression and septum grade; butyl at high temperature softens and loses seal force.
- Evaporation over a long queue: screw caps with PTFE/silicone septa and correct torque outperform crimp caps for multi-hour queues; check fill volume and cap torque.
- Inconsistent results across analysts: standardize the crimper and torque driver, and train to the gauge, not to feel.
Regulated labs should tie this checklist to the method validation record. The U.S. EPA SW-846 test methods are a useful reference for how sample handling and container integrity are documented in a formal method, and the same discipline applies to closure qualification in a pharmaceutical or environmental lab.
Buying Decisions: What to Specify and What to Skip
When you write the purchase specification, be explicit. The following parameters belong on every closure requisition:
- Neck finish and diameter: GPI thread designation, 11 mm, 9 mm, 13 mm, or 20 mm.
- Shell material and thickness: aluminium, 0.25 to 0.30 mm for 11 mm crimp.
- Septum construction: material, face configuration, thickness (typically 1.0 to 1.5 mm for 11 mm closures), and Shore A hardness.
- Temperature rating: continuous and peak, with the 20 °C margin stated.
- Puncture count: validated for your needle gauge and injection protocol.
- Extractables and background: blank-run acceptance criteria at your detection wavelength or m/z.
- Lot traceability and retention sample: required.
- Packaging: sealed, desiccated where appropriate, with a defined shelf life.
What to skip: “universal” caps, unrated septa sold only by color, and any closure without a stated temperature and puncture specification. The four cents you save will be spent ten times over in repeat injections and investigation time. For a broader catalog view of what is available across closure types and vial formats, the Vial Closures range and the Chromatography Consumables catalog are useful references when you are building a standardized list for a multi-site lab.
Recommendation
For a general-purpose HPLC and GC lab running validated methods, standardize on 11 mm crimp closures with laminated PTFE/silicone/PTFE septa for trace and MS work, and PTFE-faced silicone for routine UV and FID work. Pair them with 12 x 32 mm vials, set the crimper so septum compression is 30 to 40 percent, and budget 3 to 5 punctures per closure for routine work and 5 to 8 for laminated septa. For headspace, use 20 mm crimp closures with butyl or PTFE-faced silicone septa rated to at least 20 °C above your method temperature. For screw-thread platforms, use 9 mm caps torqued to 0.4 to 0.6 N·m with a calibrated driver. Write the GPI thread designation, temperature rating, puncture count, and blank-run acceptance criteria into the purchase specification, keep a retention sample from every lot, and run a blank injection before you release a new lot into production.
Do that, and the closure stops being the variable you blame when a sequence fails. It becomes the part of the workflow you no longer think about, which is exactly what a well-chosen consumable should be.